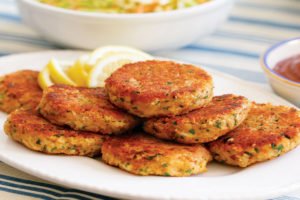
Craving a dish that’s both elegant and incredibly satisfying? Get ready to embark on a culinary adventure with Chef Zakir’s Chicken Ala-Kiev recipe! This isn’t just any chicken dish; it’s a golden-crusted delight hiding a luscious, herby butter center that will explode with flavor with every bite. Follow along as we break down this classic recipe into easy-to-follow steps, complete with insider tips and creative variations to make it your own. Get ready to impress your family and friends with this restaurant-style meal!

How to Make Chicken Ala-Kiev: Step-by-Step Instructions
Let’s get started on creating this culinary masterpiece! Here’s a detailed guide to help you every step of the way:
1. Prepare the Chicken
Take 2 chicken breasts and carefully slice them horizontally, almost all the way through, to create a “book” shape. Open them up and gently flatten them slightly using a meat mallet or the back of a heavy pan. This will help them cook evenly and create space for the buttery filling. Season both sides of the flattened chicken breasts generously with salt, black pepper powder, and white pepper powder. Set them aside to marinate while you prepare the butter.
2. Whip Up the Garlic Herb Butter
Finely chop approximately 1 tablespoon of fresh parsley. In a bowl, combine the chopped parsley with 100 grams of softened (but not melted) butter and 4 cloves of minced garlic. Mix everything thoroughly until the parsley and garlic are evenly distributed throughout the butter.
3. Form the Butter Logs
Divide the herbed garlic butter into two equal portions. On a piece of parchment paper or plastic wrap, shape each portion into a small, elongated log. Place these butter logs in the refrigerator or freezer for about 10-15 minutes to firm up. This will make them easier to handle and encase within the chicken.
4. Stuff and Fold the Chicken
Once the butter logs are firm, take one marinated chicken breast and place a chilled butter log in the center. Carefully fold the sides of the chicken breast over the butter, ensuring it’s completely sealed inside. You might need to tuck and fold the edges to prevent the butter from leaking out during cooking. Repeat this process with the second chicken breast and butter log.
5. Prepare the Breading Station
In one bowl, whisk together 2 tablespoons of all-purpose flour, 1 tablespoon of cornflour (this helps with extra crispiness), 1 egg, ¼ teaspoon of black pepper, ¼ teaspoon of white pepper, and salt to taste. In a separate shallow dish, place a generous amount of breadcrumbs.
6. Bread the Chicken
Take one of the stuffed chicken breasts and dredge it thoroughly in the flour mixture, ensuring all surfaces are coated. Then, dip the floured chicken into the egg mixture, again making sure it’s fully covered. Finally, transfer the chicken to the breadcrumbs and press gently to coat it evenly on all sides. Repeat this breading process for the second chicken breast.
7. Shallow Fry to Golden Perfection
Heat a generous amount of oil in a large skillet over medium heat. The oil should be deep enough to come about halfway up the sides of the chicken. Once the oil is hot (test by dropping a small breadcrumb – it should sizzle immediately), carefully place the breaded chicken breasts in the skillet. Avoid overcrowding the pan; cook in batches if necessary.
8. Cook Until Golden Brown and Cooked Through
Fry the chicken for 8-10 minutes on one side, or until it’s beautifully golden brown and crispy. Gently flip the chicken and continue frying on the other side for another 8-10 minutes, or until it’s cooked through and the internal temperature reaches 165°F (74°C).
9. Rest and Serve
Once cooked, carefully remove the Chicken Ala-Kiev from the skillet and place it on a wire rack or paper towel-lined plate to drain any excess oil. Let it rest for a couple of minutes before serving. This allows the juices to redistribute and prevents the hot butter from squirting out too forcefully when cut.
Check it out the Chicken Ala-Kiev Recipe by Chef Zakir and printable version here!!

Indulge in tender chicken breasts encasing a luscious, herby garlic butter center, all enveloped in a crispy golden crust. This classic Chicken Ala-Kiev recipe by Chef Zakir promises a burst of flavor with every delightful bite.
- 2 Chicken breasts
- 1 Egg
- 4 cloves Garlic minced
- 100 gm Butter softened
- 2 tbsp All-purpose flour
- 1 tbsp Cornflour optional, for extra crispiness
- Bread crumbs as needed
- 1 tbsp Fresh parsley finely chopped
- ¼ tsp Black pepper powder
- ¼ tsp White pepper powder
- Salt to taste
- Oil for shallow frying
-
Cut each chicken breast horizontally to create a “book” shape. Flatten slightly and season with salt, black pepper, and white pepper.
-
Combine softened butter, minced garlic, and chopped parsley. Divide into two equal portions and shape into small logs. Chill in the refrigerator or freezer for 10-15 minutes.
-
In one bowl, whisk together flour, cornflour (if using), egg, black pepper, white pepper, and salt. Place breadcrumbs in another shallow dish.
-
Place a chilled butter log in the center of each chicken breast. Fold the chicken around the butter, sealing the edges.
-
Dredge each stuffed chicken breast in the flour mixture, then dip in the egg mixture, and finally coat thoroughly with breadcrumbs.
-
Heat oil in a skillet over medium heat. Shallow fry the chicken for 8-10 minutes per side, until golden brown and cooked through.
-
Remove from skillet and let rest on a wire rack or paper towel-lined plate for a few minutes before serving.
Chef Zakir’s Top Tips and Tricks for Perfect Chicken Ala-Kiev
- Cold Butter is Key: Make sure the butter logs are thoroughly chilled or even slightly frozen. This will prevent them from melting too quickly during the frying process.
- Seal it Tight: Ensure the chicken completely encases the butter. Any gaps or openings will allow the butter to escape, resulting in a less flavorful and potentially messy dish.
- Double Breading for Extra Crunch: For an extra crispy coating, you can double bread the chicken. After the first layer of breadcrumbs, dip it back into the egg mixture and then into the breadcrumbs again.
- Don’t Overcrowd the Pan: Frying too many chicken breasts at once will lower the oil temperature, resulting in soggy rather than crispy chicken. Cook in batches for the best results.
- Control the Heat: Maintain a medium heat to ensure the chicken cooks through evenly without burning the outside.
- Rest is Important: Don’t skip the resting period after frying. It allows the chicken to relax and the hot butter to slightly cool, making it more enjoyable to eat.
Other Delicious Variations to Try
While the classic Chicken Ala-Kiev is divine, feel free to experiment with these exciting variations:
- Herb Infusions: Get creative with your butter! Try adding finely chopped dill, chives, or tarragon for a different flavor profile.
- Cheesy Center: Incorporate a small cube of your favorite cheese (like mozzarella or Gruyere) into the butter filling for an extra gooey surprise.
- Spicy Kick: Add a pinch of red pepper flakes or a dash of hot sauce to the butter mixture for a subtle heat.
- Garlic Lovers’ Delight: Increase the amount of garlic in the butter or even roast the garlic beforehand for a sweeter, milder flavor.
- Lemon Zest: A little lemon zest in the butter can add a bright and zesty note to the dish.
Serving Suggestions for a Memorable Meal
Chicken Ala-Kiev is a star on its own, but it pairs wonderfully with a variety of sides:
- Classic Pairings: Creamy mashed potatoes, fluffy rice pilaf, or buttered noodles are traditional and comforting accompaniments.
- Fresh Vegetables: Steamed green beans, roasted asparagus, or a vibrant side salad provide a lovely contrast to the richness of the chicken.
- Crusty Bread: Serve with crusty bread to soak up any of that delicious garlic butter that might escape.
- Lemon Wedges: A squeeze of fresh lemon juice can brighten up the flavors.
Ready to experience the magic of homemade Chicken Ala-Kiev? Follow Chef Zakir’s recipe and treat yourself to a truly special meal. We’d love to hear how it turns out! Share your thoughts and any modifications you try in the comments below. Happy cooking!


